There will be many doubts for the beginners of SAP BASIS, on how to perform DB refresh activities with SAP.
Scenario:- Need to perform DB refresh with latest offline/Online backup taken from Production system to Quality system.
Here are the detailed steps to perform the same.
Pre-requsities/Primary steps to be performed in Quality server before starting DB refresh.
1) Take the backup of existing User Master records in Quality system using client copy export method.
Goto SCC8 T-code and perform client export with SAP_USER profile, target system and execute.
The client export will create 3 Transport requests.
2) Take the backup of existing RFC connections in Quality server (Optional)
Export the following tables
RFCATTRIB
RFCCAT
RFCCHECK
RFCDES
RFCDES_VIEW
RFCDOC
RFCLIST
RFCTRUST
RFCTYPE
Note:- Please refer the below link for learning how to export and import tables
http://sapbasisinfos.blogspot.in/2013/10/sap-export-and-import-tables-in-sap.html
3) Take the snapshot of stms_import history of transports to refer the transports performed to Quality server only.
4) Take Note of existing SAP License in Quality server.
5) Export background jobs running in Quality server (Optional)
BTCCl
BTCDELAY
BTCEVTJOB
BTCH1000
BTCH1010
TBTCO
TBTCP
Note:- Please refer the below link for learning how to export and import tables
http://sapbasisinfos.blogspot.in/2013/10/sap-export-and-import-tables-in-sap.html
6) Take note of Logical system naming conventions of existing clients in Quality server from BD54
Start Restoration in Quality server:-
Perform Restoration in Quality Server using BRTOOLS or using any third party backup utility.
Start Post restoration activities:-
Once restoration is completed proceed with post restoration activities
1) Create control trace from Production system and modify the SID and data files path accordingly and save the file as control.sql
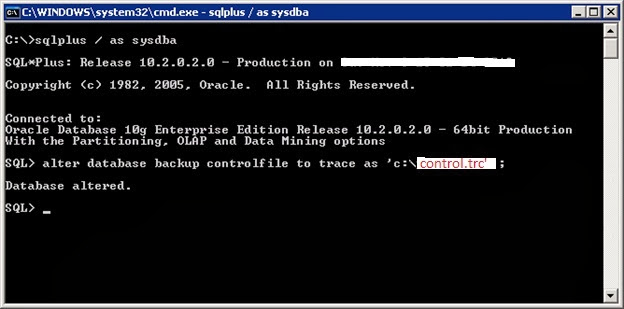
Open control.trc file and modify the files as following
In the first line change the words from REUSE-->SET, SID--> Target DBSID, NORESETLOGS--> RESETLOGS, NOARCHIVELOG--> ARCHIVELOG
STARTUP NOMOUNT
CREATE CONTROLFILE SET DATABASE "<SID>" RESETLOGS ARCHIVELOG
MAXLOGFILES 16
MAXLOGMEMBERS 3
MAXDATAFILES 100
MAXINSTANCES 8
MAXLOGHISTORY 292
LOGFILE
Change all datafile locations with target SID, and remove all unwanted lines, there should not be any space in between any of the lines.
Then save the file as control.sql and paste it in the quality server.
2) Now remove the control files got restored from backup in the control file location in quality server.
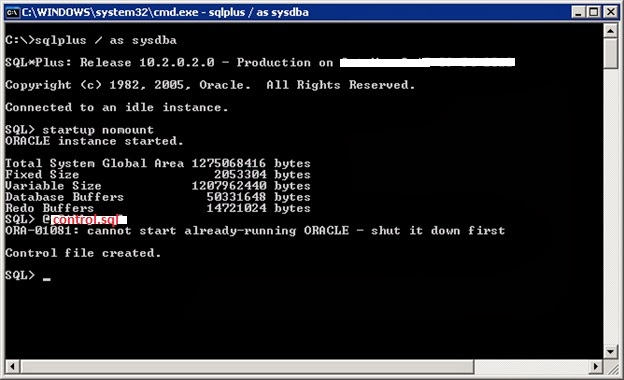
3) Next login to sqlplus and new create control file for Quality server.
Sql> Startup nomount
Sql> @control.sql
Sql> recover database using backup controlfile until cancel
(use this option to recover DB with archive logs, if its an online backup)
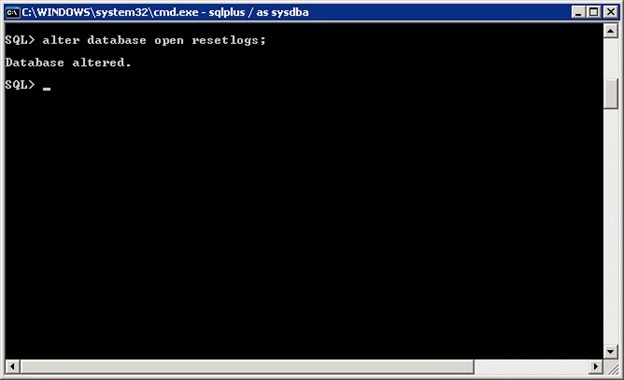
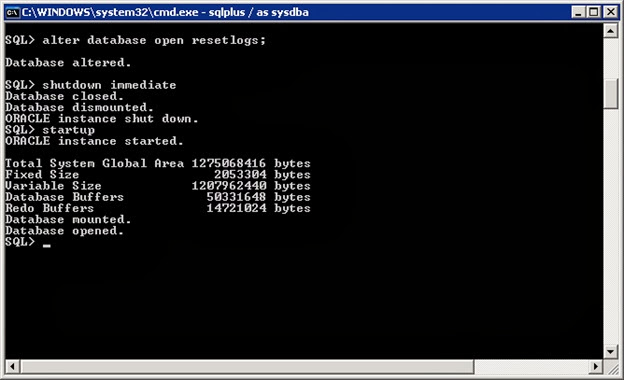
Sql> alter database open resetlogs
Sql> shutdown immediate
Sql> Startup
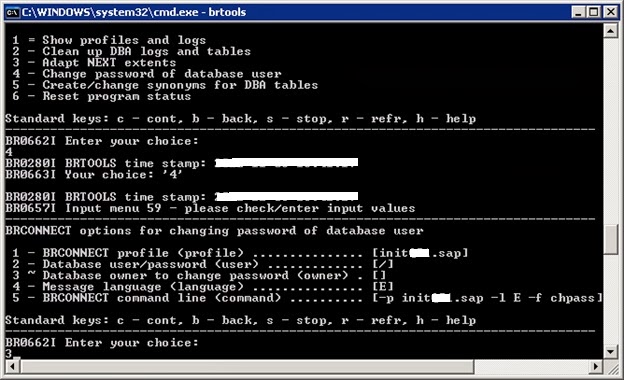
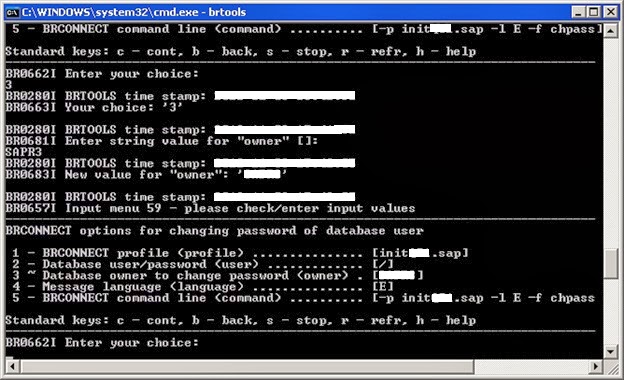
4) Next drop the OPS$ users and create new users according to SAP Note 400241
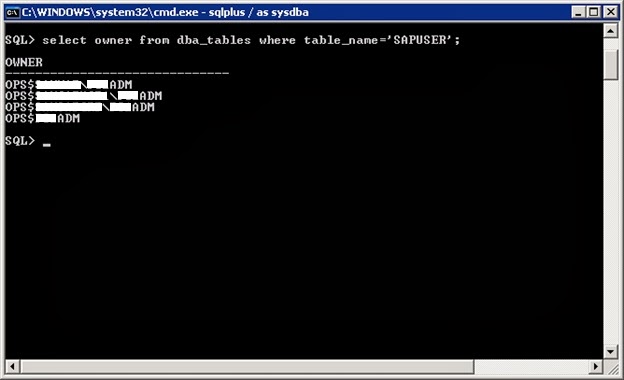
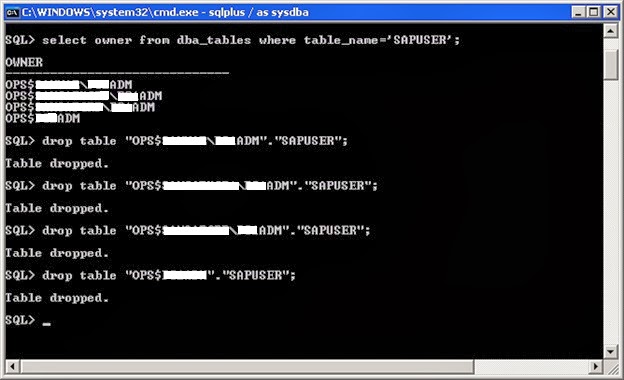
Sql> select owner from dba_tables where table_name='SAPUSER';
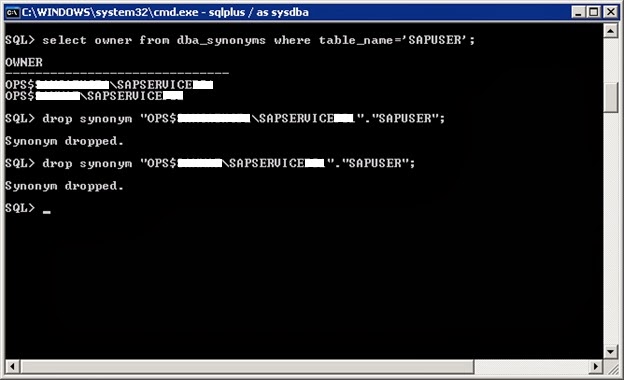
Sql> select owner from dba_synonyms where synonoym_name='SAPUSER';
Sql> drop table "OPS$<SID>ADM"."SAPUSER";
Sql> drop synonym "OPS$SAPSERVICE<SID>."SAPUSER";
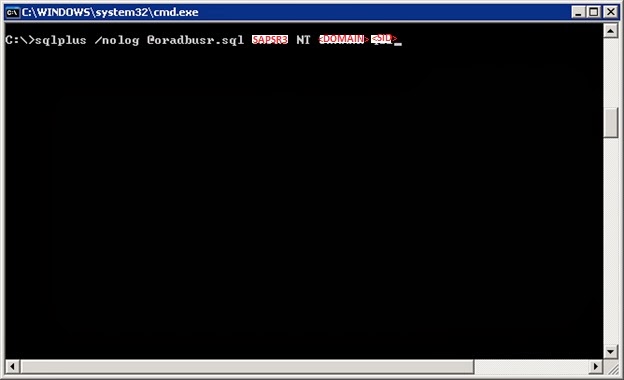
Sql> sqlplus /nolog @oradbusr.sql NT <SID> SAPSR3 <Domain>/<Hostname> <SID>
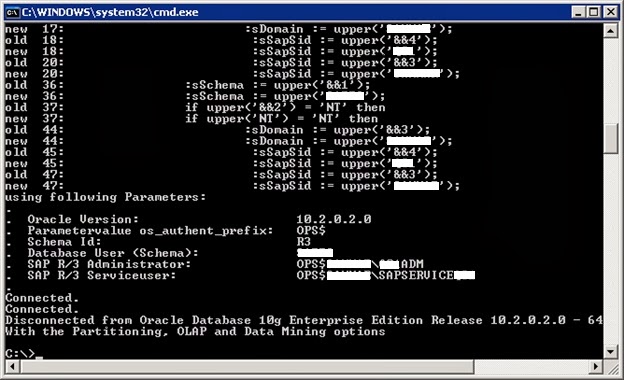
Reset the schema user password, so that the passwords will get updated in the OPS$ tables which we have created.
Once OPS$ users created & schema password reset, check the db connection with SAP from OS level, using the below command from command prompt or terminal.
cmd> R3trans -d
The command should return 0000 as return code, if not trouble shoot the same using SAP Note 400241.
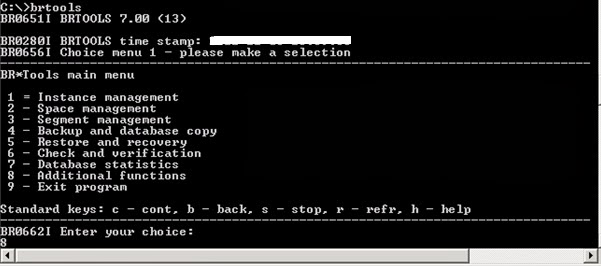
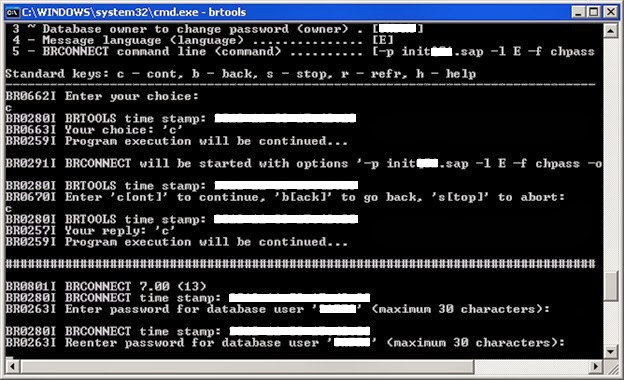
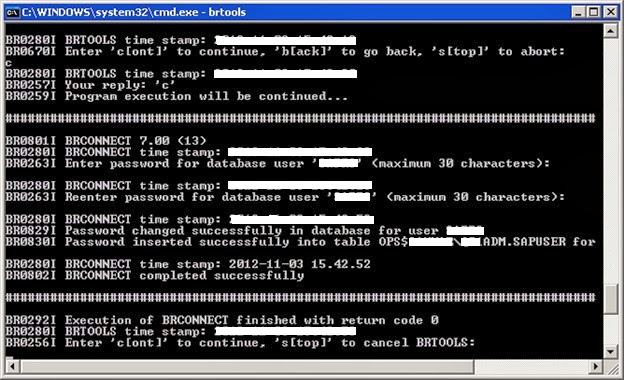
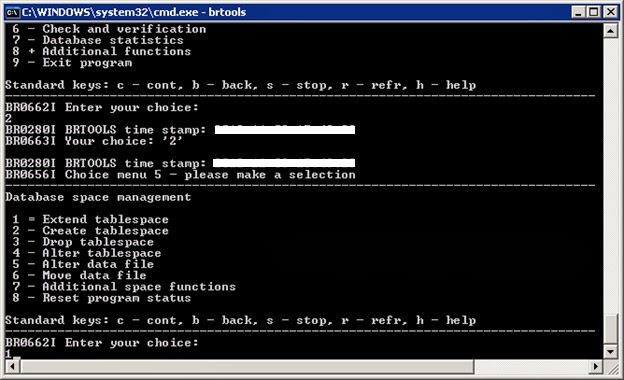
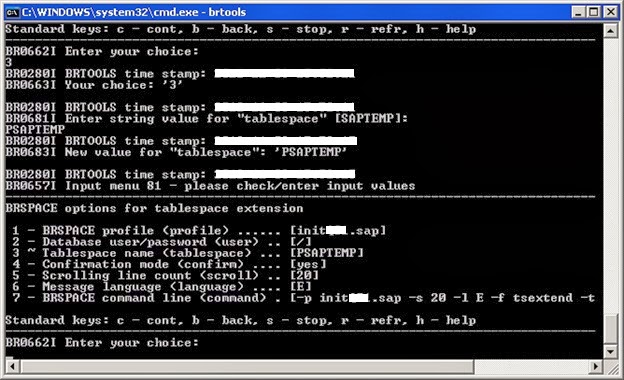
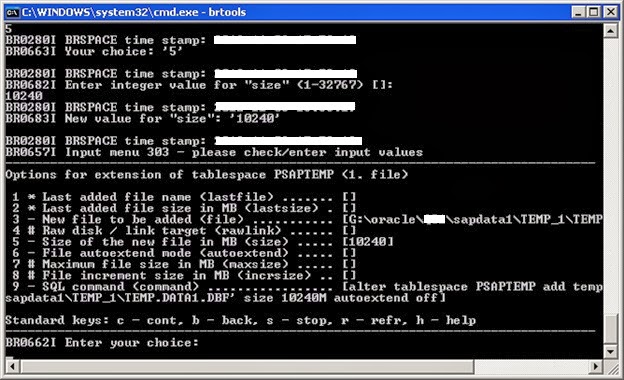
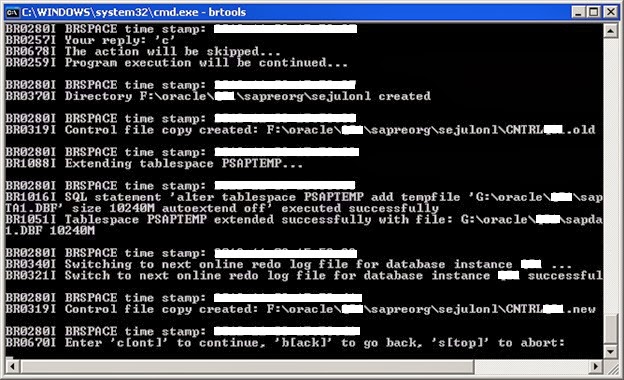
5) Create temporary tablespace
create temporary tablespace using BRTools as below.
6) SAP license install
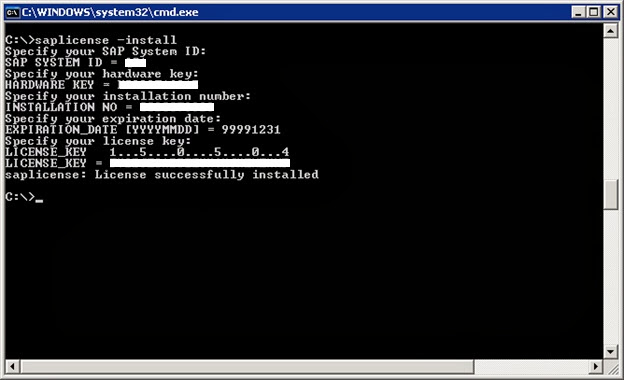 Note:-
 For digital signatured license please use "saplicense -pinstall" option, if that does not work, make the SAP up and apply license using SAP* user with T-code "SLICENSE".
6) You can start SAP at this stage and start performing post restoration activities from SAP level.
Note:- If there is a condition that no background job has to run during SAP startup, just make background workprocess parameter "rdisp/wp_no_btc" to zero and start SAP.
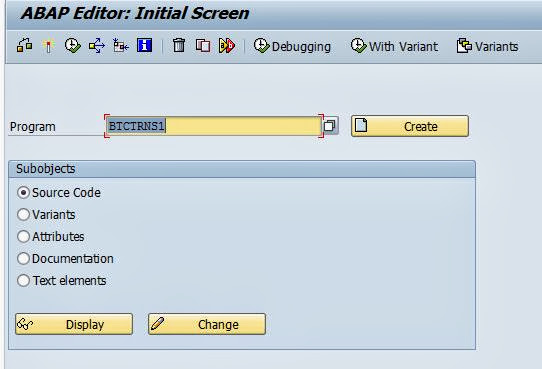
a) Suspend all existing background jobs by running report "BTCTRNS1" in SE38 T-code

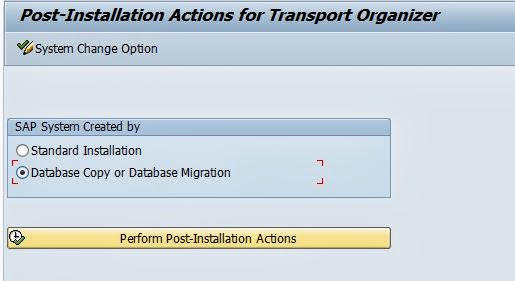
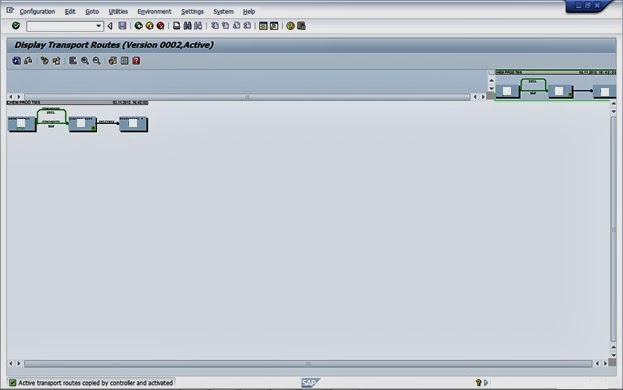
b) Reconfigure TMS configuration in Quality server with production TMS as reference.
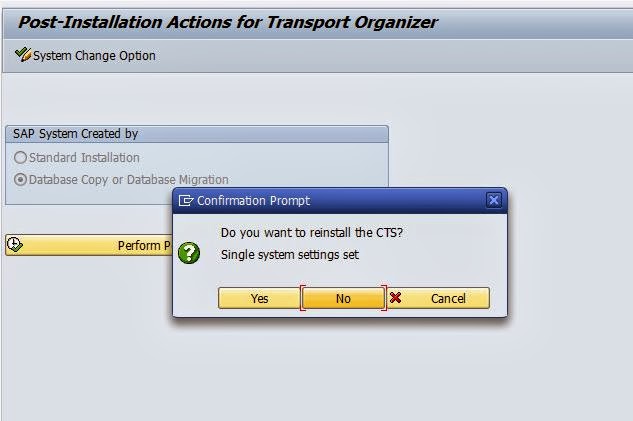
Goto SE06 T-code and select "Database copy or Database Migration", click "Perform post-Installation Actions"
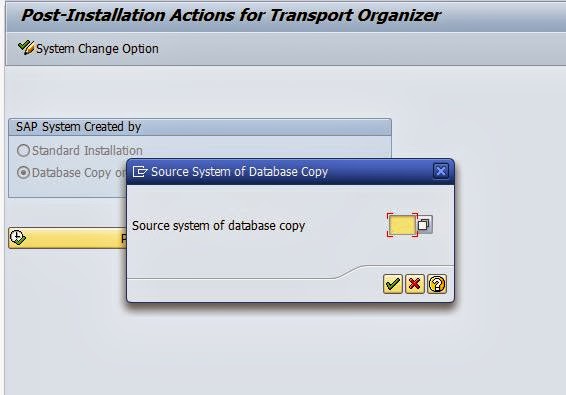
Provide the SID of Production system and continue.
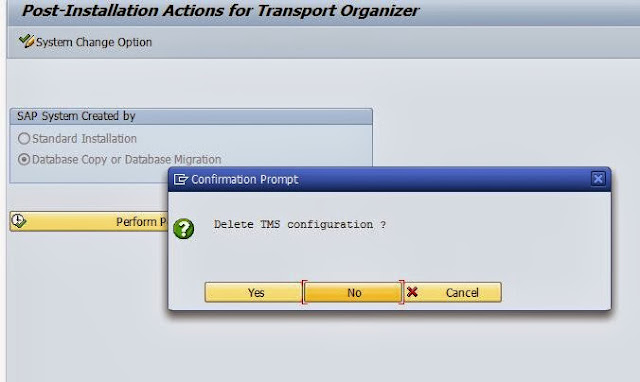
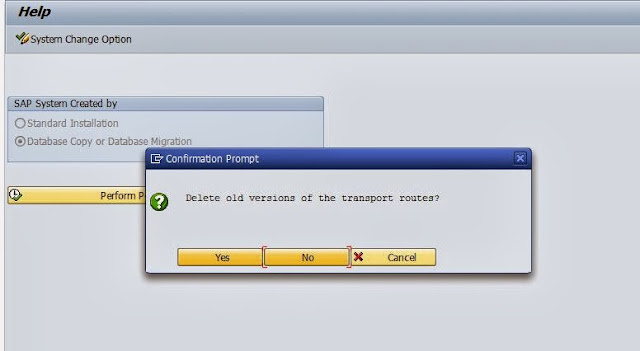
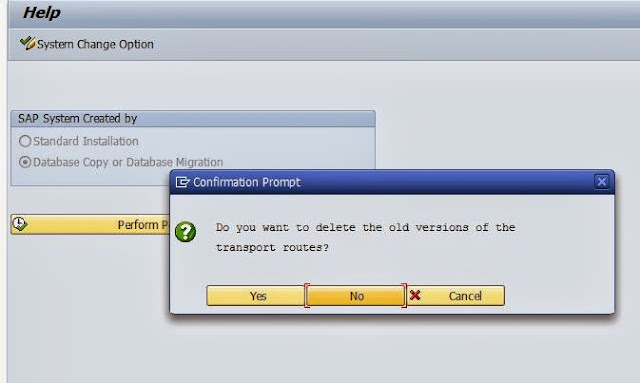
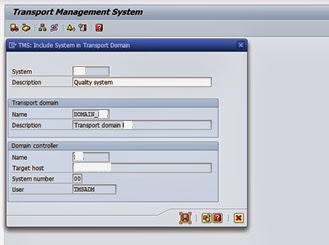
Old TMS configuration is deleted and now reconfigure TMS by login to 000 client and goto STMS T-code & create the transport system with the existing domain controller.
After configuration the TMS configuration will show inconsistency in transport route, just goto transport route page
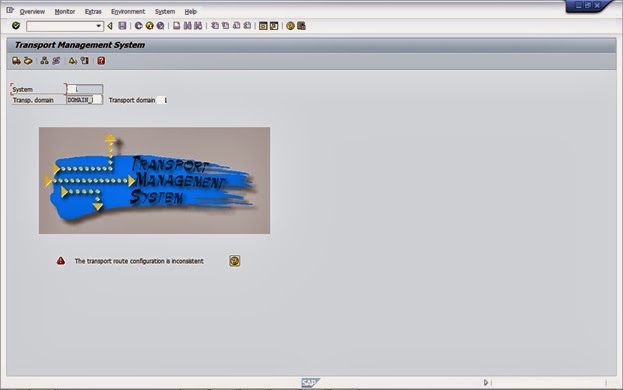
And adjust the transport route of quality server with domain controller.

The system will automatically configure the transport route by adjusting with domain controller.
c) Import RFC destinations which you have exported earlier from quality server.
Note:- Please refer the below link for learning how to export and import tables
http://sapbasisinfos.blogspot.in/2013/10/sap-export-and-import-tables-in-sap.html
d) Import background jobs which you have exported earlier from quality server. (Optional)
Note:- Please refer the below link for learning how to export and import tables
http://sapbasisinfos.blogspot.in/2013/10/sap-export-and-import-tables-in-sap.html
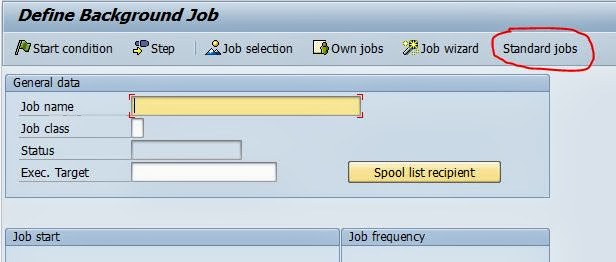
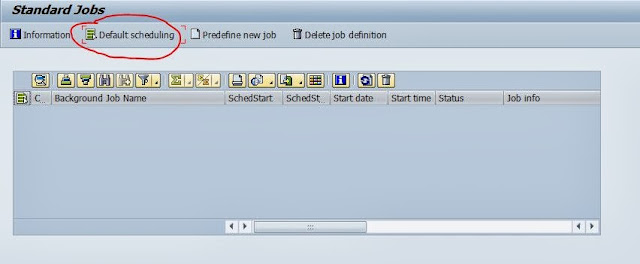
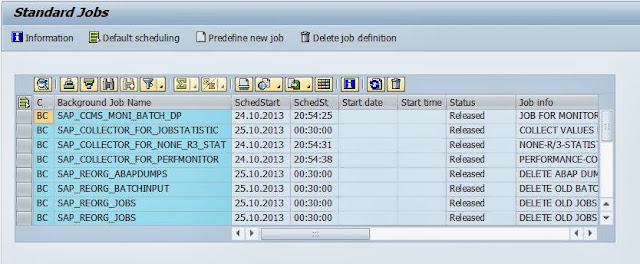
e) Schedule standard background jobs from SM36 T-code
f) Perform client copy import with user master records, which you have exported earlier.
To perform goto STMS_IMPORT T-code and add the transport requests to tp buffer and start import to the respective client.
Once import is complete perform post import activities from SCC7 T-code.
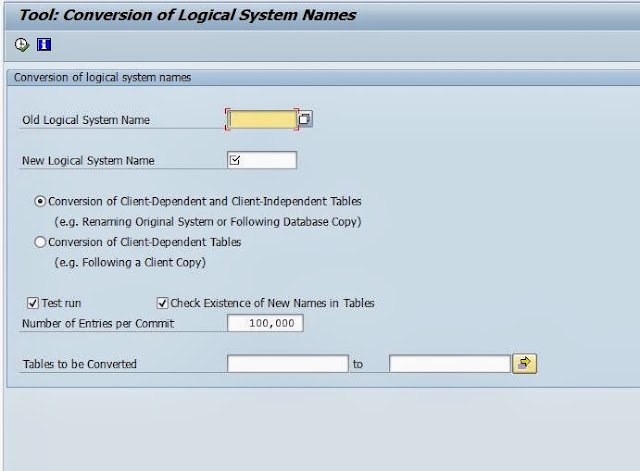
g) Perform logical system name conversion for quality server using T-code BDLS
Provide the Production system logical name in "Old Logical System Name" and Quality server logical name in "New Logical System Name" and execute.
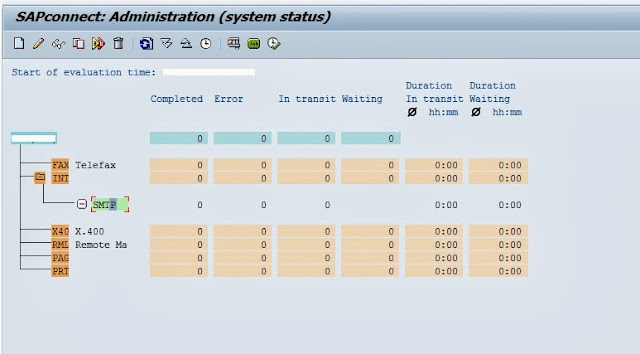
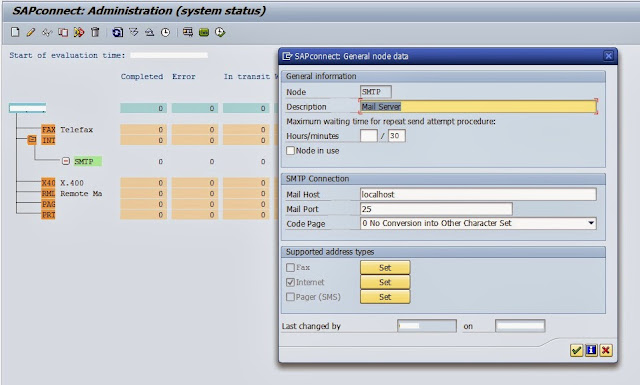
h) Reconfigure email from T-code SCOT
Double click on SMTP and provide your mail server IP address in "Mail Host" and port number.
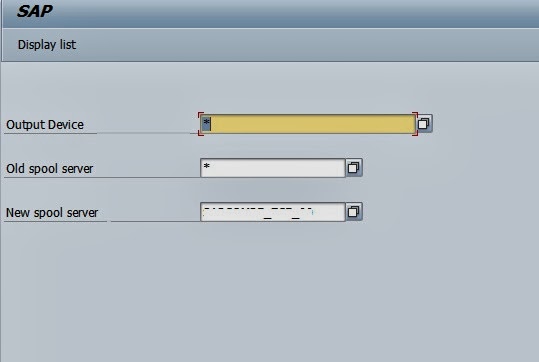
 i) Change the spool server for all the printers using T-code SPAD

Provide the quality server spool server name and press enter.
j) Reconfigure operation modes from T-code RZ04
That's all need to perform for the completion of post activities, now you can release users and start using quality server.


