CCMS alert can be configured within an ABAP system for own system monitoring, but for effective monitoring of all systems in a customer landscape, SAP recommends to use solution manager as a parent system to monitor and report alerts to the customer.


Creating the CSMREG User
Check if the CSMREG user is created in the central monitoring system. If not, perform the following steps.


(Test). If errors occur, check the
connection data entered above.


sapccm4x
-R pf=/usr/sap/<SID>/SYS/profile/<SID>_DVEBMGS00_<HOSTNAME>


Perform the Steps in Solution Manager System
Activating Background and
Central System Dispatching
For all
data collection methods in the monitoring architecture to be correctly started,
Background dispatching needs to be activated. It starts all data collection
methods that are executed periodically in the background process (as jobs). To
execute an auto-reaction in CEN for alerts from remote systems, central system dispatching
needs to be activated. Activate background dispatching in CEN and in all
monitored ABAP systems in client 000.
1. Call
transaction RZ21. The Monitoring: Properties and Methods screen appears.
2.
Choose Technical Infrastructure ->Local Method Execution ->Activate Background
Dispatching.
Background
dispatching is performed by the job SAP_CCMS_MONI_BATCH_DP,
which runs once an hour. Note that not only this job, but also the data
collection methods started by this job, run under your
user name. You should therefore ensure that your user has the authorizations
required for this.
Activate
central system dispatching in CEN:


1. Call
transaction RZ21. The Monitoring: Properties and Methods screen appears.
2.
Choose Technical Infrastructure -> Configure Central System ->Activate
Central System Dispatching.
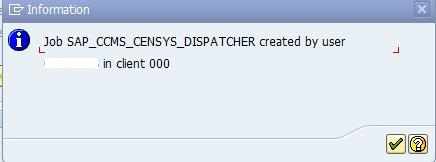
Central
system dispatching is performed by the job SAP_CCMS_CENSYS_DISPATCHER.


Creating the CSMREG User
Check if the CSMREG user is created in the central monitoring system. If not, perform the following steps.
v In central monitoring system, call the transaction RZ21 and choose
Technical Infrastructure > Configure Central System > Create CSMREG User.


Creating the CSMCONF Start File for CCMS Agent
In the central
monitoring system, generate the connection data in a CSMCONF file.
v
In
the central monitoring system, call the transaction RZ21 and choose Technical
Infrastructure > Configure Central System > Create CSMCONF Start File for
Agents.


Manage the Monitored system host and port Entries in /etc/services and /etc/hosts on Solution Manager System.
Sapms<SID> 36<Instance Number>/tcp

Enter Monitored ABAP Systems in CEN
To
monitor remote ABAP systems in CEN, create a corresponding entry in the alert monitor.
1. In
CEN, call transaction RZ21.
2.
Choose Technical Infrastructure -> Configure Central System -> Create
Remote Monitoring Entry.

3. The
Add Component to Monitoring screen appears. Choose the system connection type ABAP/JAVA/Dual
Stack as the component type to be monitored.

4.
Choose Configuration ->Expert Mode, and in the group box Tasks to Be Executed,
choose the Create Only RFC Connection to System radio button.

5. In
the Monitored System group box, specify the connection data for the ABAP system
that you want to monitor centrally.

7. Save
your entries and enter all other ABAP systems to be monitored in the same way.
Scheduling Jobs to Display
Statistics Data
To display
statistics data for remote systems in CEN, you require the jobs
SAP_COLLECTOR_FOR_PERFMONITOR
and SAP_COLLECTOR_FOR_NONE_R3_STAT.

Perform the Steps in Monitored systems
Registering a CCMS Agent SAPCCM4X in Monitored systems.
v Download the latest SAPCCM4x
agent from market place if required and extract to your kernel dir.
vLog on to the host of the ABAP instance as
<SID>adm, to ensure that the agent can access the shared memory.
As user <Sid>adm create
directory /usr/sap/<SID>/<instance_name>/log/sapccm4x
Ex: su – <SID>adm
Cd /usr/sap/<SID>/DVEBMGS00/log/
mkdir
sapccm4x
v Copy the CSMCONF start file to the working
directory of SAPCCM4X. This is in the following location:
UNIX:
/usr/sap/<SysID>/<inst.dir.>/log/sapccm4x(ex: /usr/sap/<SID>/DVEBMGS00/log/sapccm4x)
MS Windows:
[drive]:\usr\sap\<SID>\<inst.dir.>\log\sapccm4x
Go to the sapccm4x file location.
i.e. /sapmnt/<SID>/exe (Kernel Location) and run the below command.
sapccm4x -R pf=<Instance
Profile>

Choose
additional Central system “No”

Check all details are correct. Here Host
name is not identified with Domain Name. So, removed the domain name and enter
only host name.
Enter password for <satillite_user> ID and continue.


Enter
the password of CSMREG User and start the Agent.

v If you are facing any shared memory issues while starting the agent,
use below commands to start the agent.
sapccm4x -initshm pf=/usr/sap/<SID>/SYS/profile/ <SID>_DVEBMGS00_<Hostname> (initshm option to clean stop and active flags from CCMS monitoring segment)
sapccm4x
-DCCMS pf=/usr/sap/<SID>/SYS/profile/<SID>_DVEBMGS00_<Hostname>

Perform the Steps in Solution Manager:
Checking the Agent Registration (Recommended)
v To check whether the agent was
successfully registered with CEN, call transaction RZ21 in CEN, select the
radio button Agents for Remote Systems, and choose the Display Overview button.
The agent that you have just registered appears in the list in the row
SAPCCM4X.<host name>.<inst. no.>.


Add Monitored systems in Solution Manager.
Tcode
RZ20 Extras - > Activate maintenance function

v
Select CCMS Motoring sets and
click on create


Enter
the Monitor set name like above and click on Continue.
Choose monitor set “<....>_<......> Systems”
and click on “create”


v
Select the required entries that
are need for monitoring and click on Activate
.

Enter the Name of the Monitor and click on
Continue.

EDIT -> Nodes (MTE) -> Assign Methods -> Central
Auto Reaction


Auto-reaction
method is not defined here.
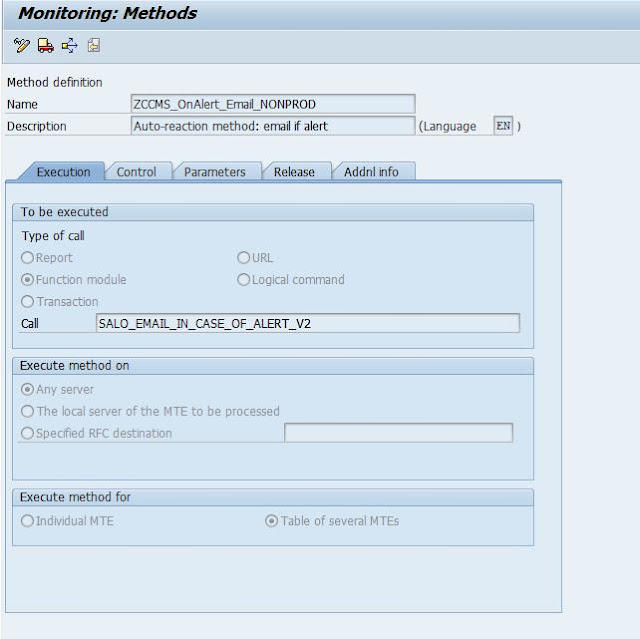
Create Auto Reaction Method.
v Click on Create

v Create Auto reaction method with template of “CCMS_OnAlert_Email .

v Create Auto reaction method with template of “CCMS_OnAlert_Email” to ZCCMS_OnAlert_Email_NONPROD.
v Do below changes in custom method ZCCMS_OnAlert_Email_NONPROD.
v In the “Control” tab Select – Only in Central system, triggered by
CCMS Agents.
v Do not check Execute method immediately under startup method.
v In Parameters tab enter the details of SENDER, RECIPIENT,
SUBJECT_ALERT, SUBJECT_ALERT_CONT, etc…
SENDER -
Sender needs to be a user ID present in client 000. ID should be mentioned all
in CAPS.
Note – For
Info - Recipient could be internet email address as above (or) could be a
shared distribution group in Business Workplace- SBWP in client 000.
v Choose option “Auto-reaction Method” in Release tab.
v Click on Save.


v Assign Central Auto reaction method for Monitor systems like below.
Select the system->choose MTE Class
& Auto reaction method->Click on “Assign Central Auto-Reaction

Choose option “Immediately after each assignment”
and click on “Continue”.

Assignments are defined like above.

v Follow the same Steps for remaining systems to add into Solution
Manager.
SCOT Configuration
v
Configure
SCOT and schedule job for sending mail in Client 000.


Define the SAPCONNECT job.
Goto Scot-> choose menu Settings and
click on “Send Jobs”.

Click on Schedule job and enter the details
like below and continue.

v Make sure default domain is mentioned under settings for SCOT else
mail will not generate.


Make
check box active for – SAP Connect does not except receipt confirm for internet
mail. This will not ask for return receipts.


v Check if Mails are getting generated in SOST and finally in Mail
box.